
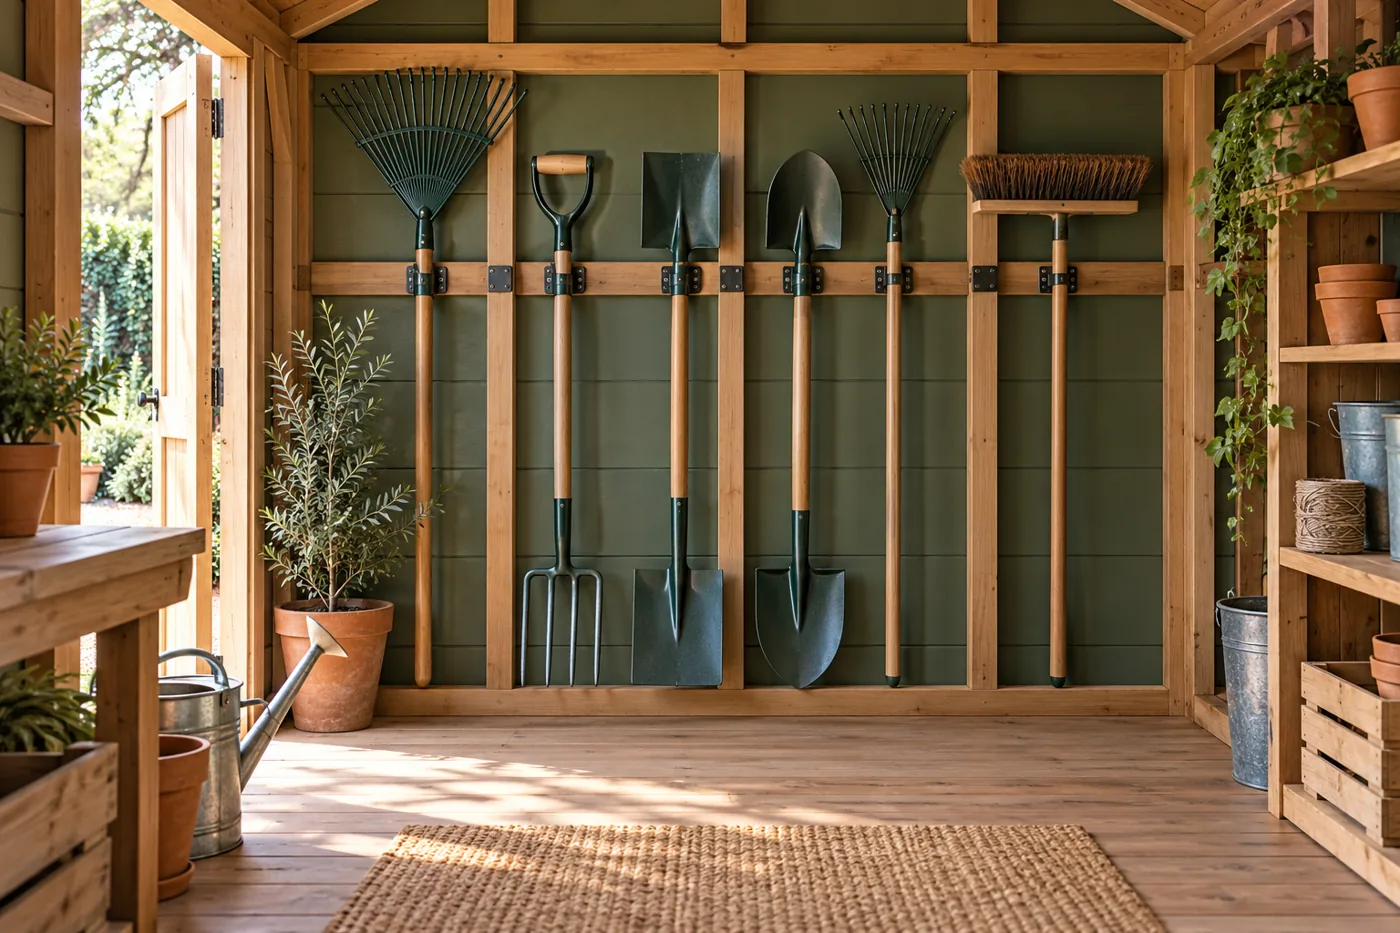
Store long-handled tools in a dedicated wall or corner zone that keeps their heads out of the walkway. Put frequently used tools closest to the entrance and leave enough space to remove each tool without knocking down the next one.
Sort by use before buying holders
Lay out rakes, shovels, hoes, brooms, and pruning tools. Separate weekly tools from seasonal ones. Clean and dry them according to their care instructions; check loose handles and damaged edges. Retire unsafe tools rather than giving them prime storage space.
Group tools by their actual head width and handle shape. A fan rake can require much more wall width than its handle suggests. Long tools also need clearance above the holder for lifting.
Compare storage methods
| Method | Good fit | Check before using |
|---|---|---|
| Individual wall holders | Frequent tools with different head shapes | Compatible attachment, grip, and removal height |
| Rail system | Flexible spacing and changing inventory | System rating and approved structural mounting |
| Floor-supported stand | Walls unsuitable for attachments | Stability, footprint, and required restraint |
| Corner container | A few lightweight blunt tools | Tipping, tangled handles, inaccessible rear tools |
Make a full-size wall mockup
Mark the available wall length with tape. Position the real tools against it, keeping heads clear of neighboring handles. Simulate lifting each tool out. Measure its maximum projection into the room, including curved handles and hardware.
For example, a rake head 24 inches wide needs a different slot than a narrow broom. Do not space holders at a uniform interval just because the rail has evenly spaced holes. Overlapping heads may work for rare-use tools but frustrate everyday retrieval.
Use three access zones
By the entrance: broom, frequently used rake, and everyday shovel, provided they do not interfere with doors or the mower route.
Along a clear side wall: secondary tools arranged by head shape. Keep sharp edges directed toward the wall where the holder design allows, and use guards supplied for cutting tools.
At the rear: seasonal tools that do not need frequent removal. Avoid storing a tool behind loaded shelving if you must unload bins to retrieve it.
Respect the shed’s wall system
A timber shed may allow suitable mounts fixed to framing. Thin cladding alone is not a reliable substitute for an appropriate structural attachment. Resin and metal sheds may require proprietary supports or freestanding systems; check model instructions before drilling.
Lifetime’s shelf kit provides a useful example of accessories tied to particular shed models. Apply the same compatibility discipline to tool rails and hooks. Do not invent a weight rating for a wall or organizer.
Keep the floor route clear
In a narrow shed, tools leaning into the aisle can negate the space gained by shallow shelving. Mark a parking zone for the mower or bikes first. Install tool storage only after checking it does not obstruct those objects’ movement or the shelf bins’ removal.
A floor stand should remain stable when one tool is pulled out. Follow its instructions for placement and restraint; if the required anchoring is incompatible with your shed, use another system.
Finish with a return routine
- Give each tool a visible, reachable home.
- Keep cleaning supplies in a small nearby bin.
- Return tools dry, with guards in place where required.
- Inspect hooks and fasteners periodically.
- Move seasonal tools when your routine changes.
Leave one unassigned position for a new tool rather than filling every inch. A slightly less crowded wall often makes a small shed more useful than maximum packing density.
Source: Lifetime accessory compatibility example, reviewed October 9, 2026. Follow the chosen organizer’s installation and load instructions.
Continue planning
- How to Organize an 8×10 Shed: Three Practical Layouts
- Small Shed Shelving: Freestanding vs. Wall-Mounted Options
- Where to Put a Shed in a Small Backyard
Image: AI-generated concept illustration; not a measured layout or product photograph.